Introduction
Now that we understand what Azure Policy is, and we’ve previously used a built-in policy to deploy resources to a specific location of our choice, today we will take it a step further. We will create a custom policy from scratch.
Today’s focus is on Azure Governance. We will explore how Azure Policy can help us improve our infrastructure management, especially as cloud environments can grow rapidly, making manual resource management a daunting task for Azure Administrators and Security professionals.
Objectives
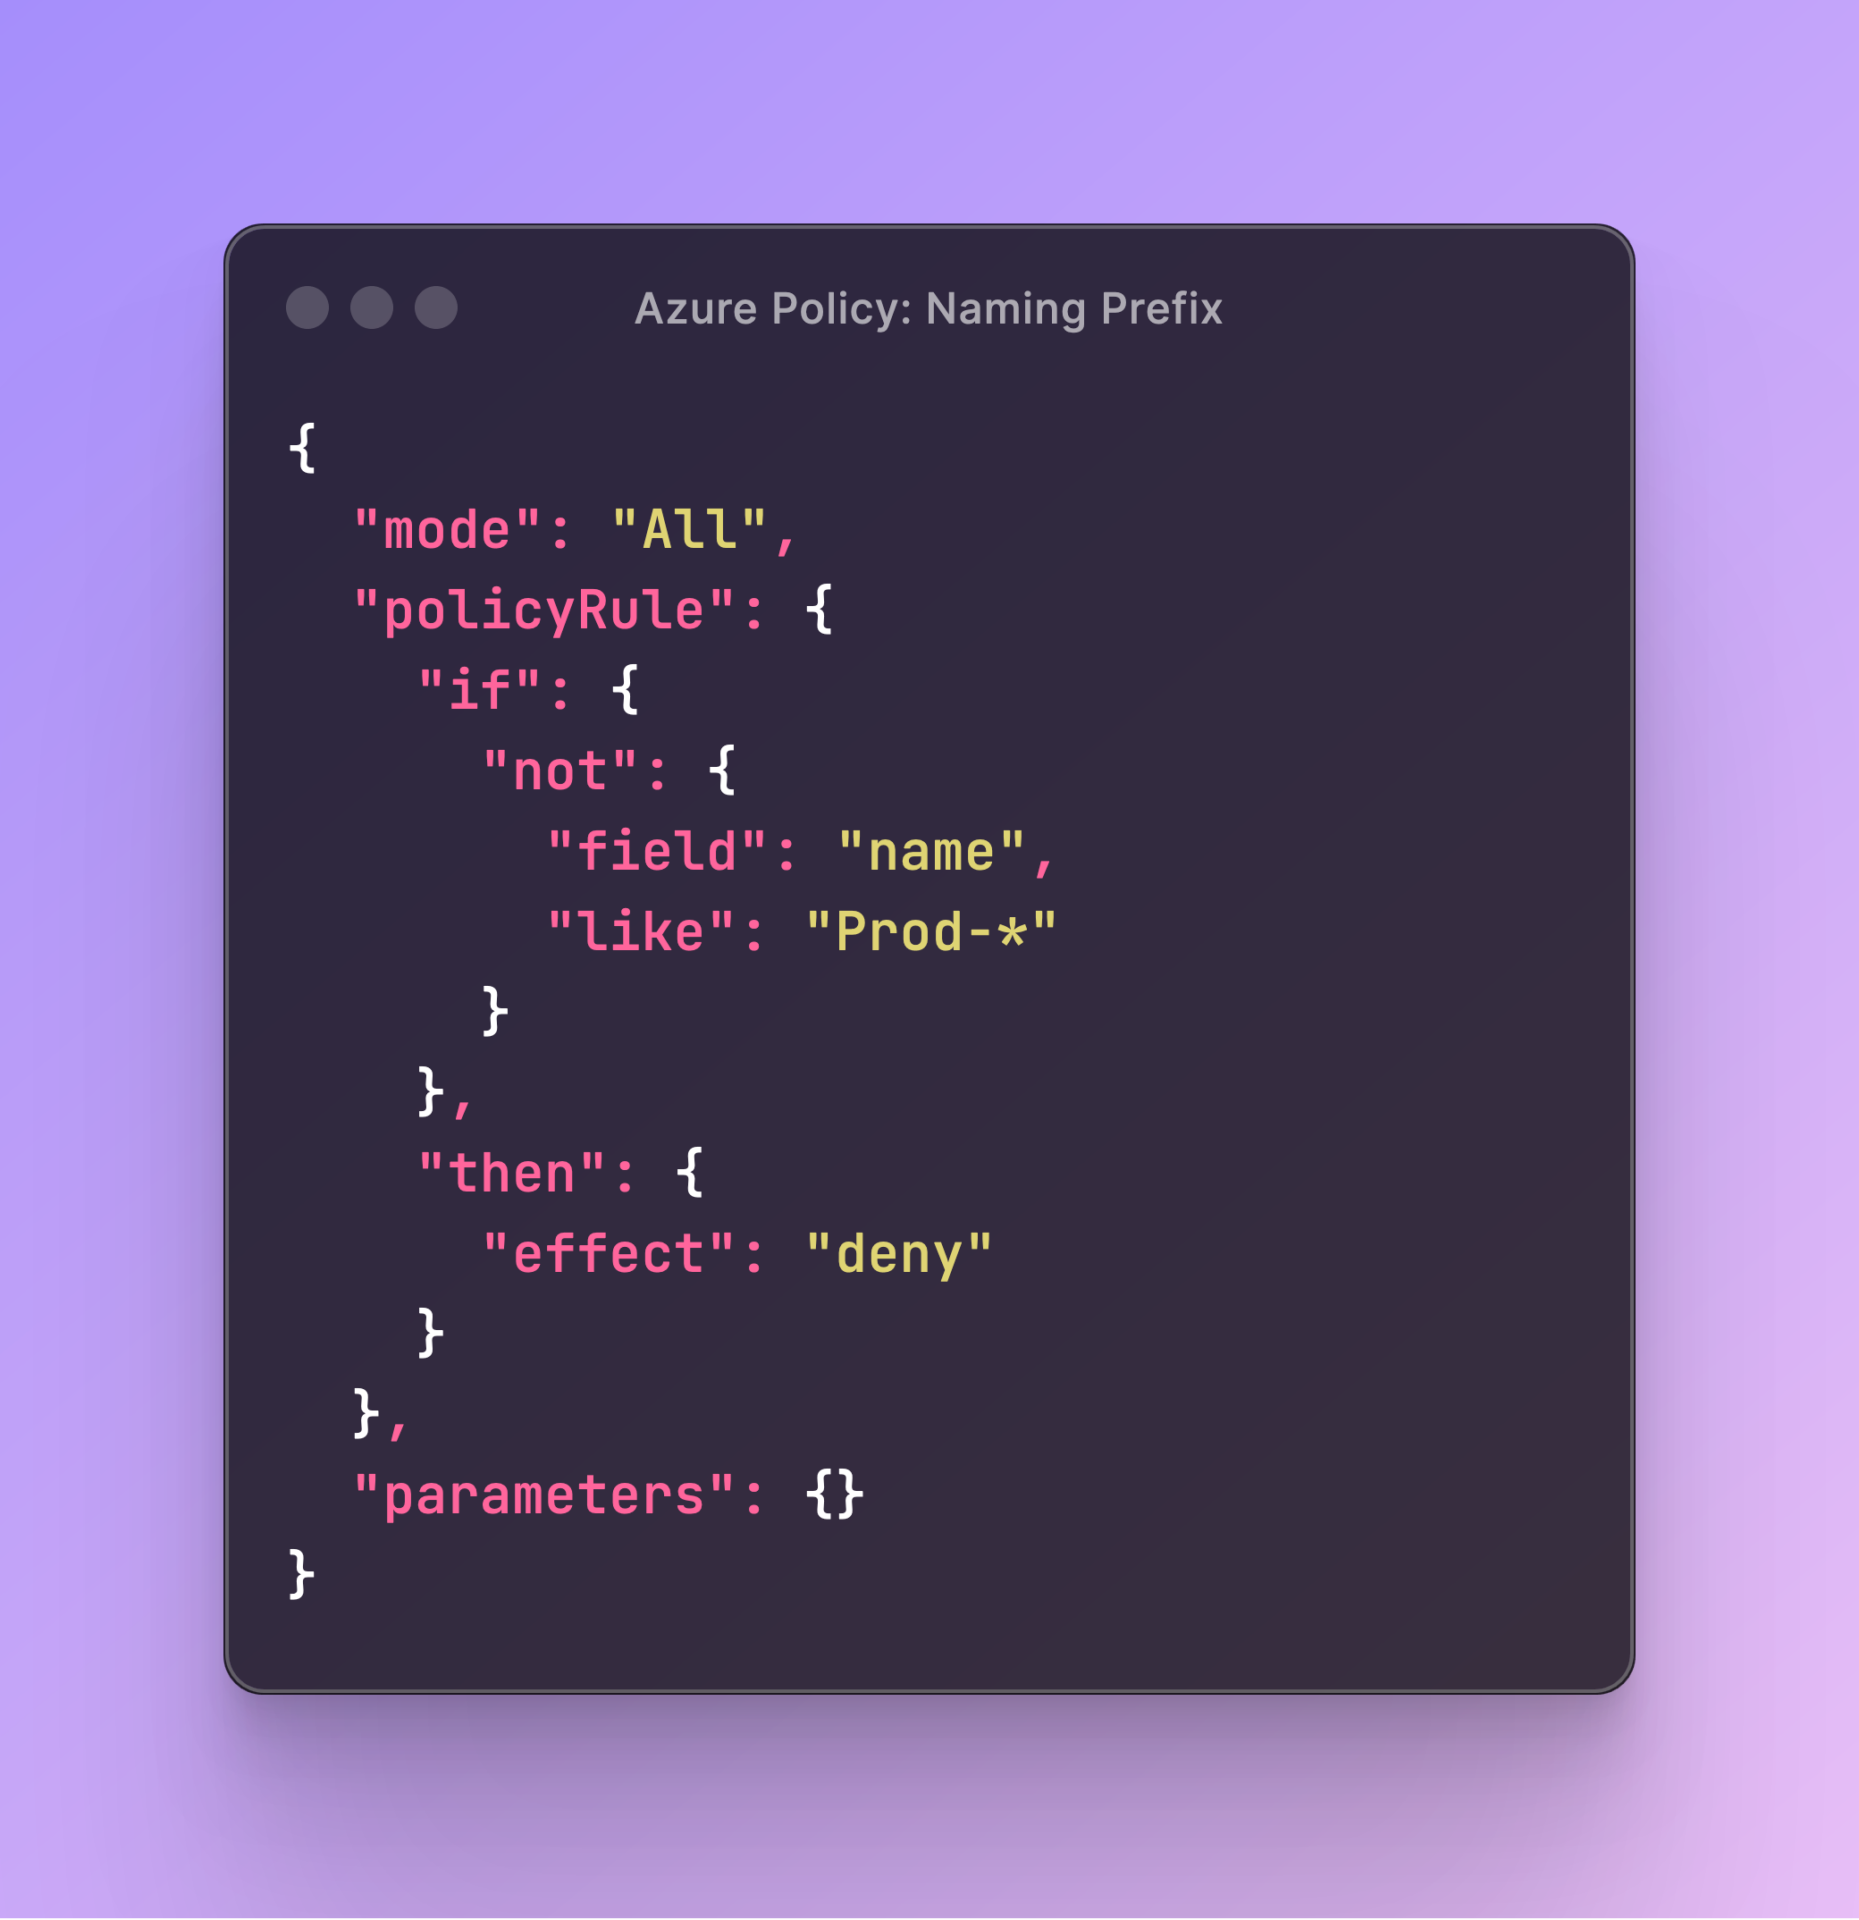
Today, our objective is to establish a consistent naming convention for all production resources hosted in our cloud infrastructure. We will create a policy to enforce that every newly deployed resource begins with the prefix “Prod-“.
Policy Components
Before starting to create the Azure Policy we should understand the basic components of the policy:
Policy Rule: The core logic of the policy, which defines the conditions under which the policy is enforced and the actions to be taken. It uses logical operators to define conditions based on properties of Azure resources.
Parameters: Allow the policy to be more dynamic and reusable by defining values that can be provided at the assignment level. Parameters can include values like resource types, naming conventions, and allowed locations.
Effect: Specifies the action to be taken when the policy condition is met. Common effects include Deny, Audit, Append, AuditIfNotExists, DeployIfNotExists, and Disabled.
Metadata: Provides additional information about the policy, such as its version, category, and description. This helps in organizing and understanding the policy’s purpose and usage.
Display Name: A user-friendly name for the policy that helps identify its purpose.
Description: A detailed explanation of what the policy does and its intended use. This helps users understand the policy’s function and rationale.
Mode: Specifies the scope of the policy, such as whether it applies to all resource types or only to resource types that support tags and locations. The two modes are All and Indexed.
Creating Custom Policy
Now that we know the basics of the Azure Policy let’s create our first custom policy to do that first let’s head over to the Azure policy definition tab and click policy definition
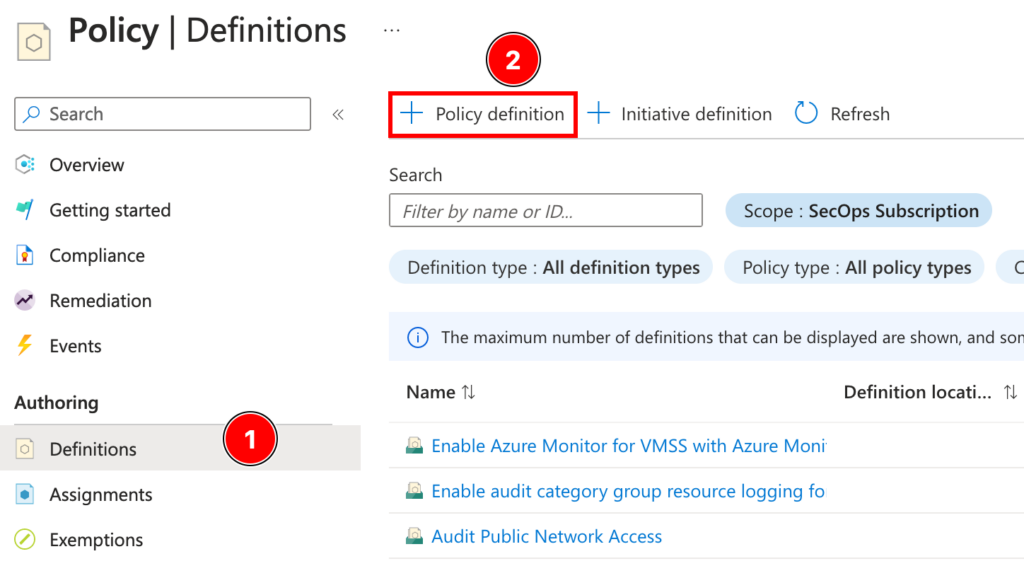
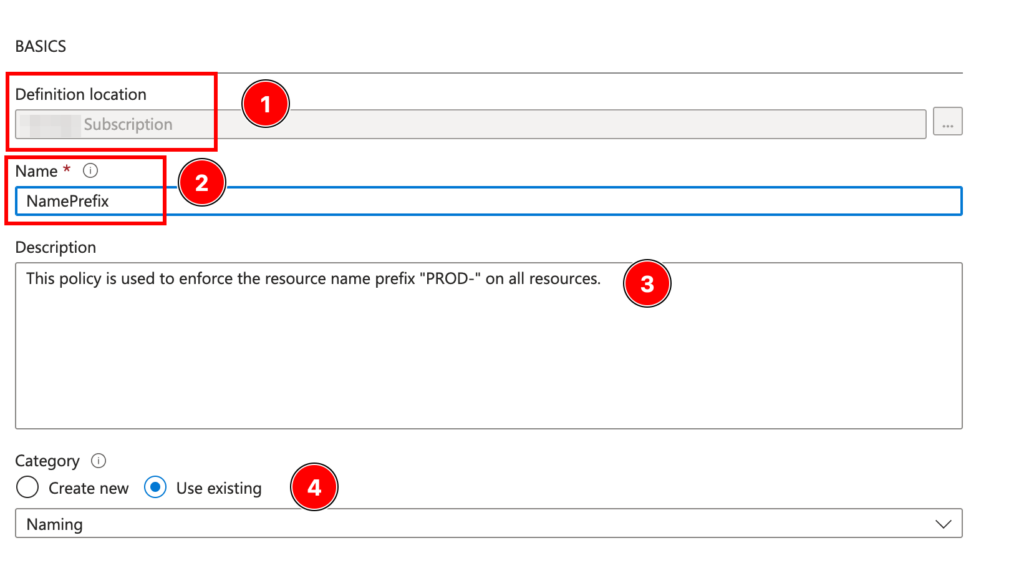
Let’s begin by configuring the basics of our Azure Policy. First, we need to set the Policy Location, which determines where this policy can be assigned, such as a specific subscription or a Management Group.
Next, we will assign a name, provide a description, and categorize the policy. This helps in identifying the policy’s purpose, understanding its function, and organizing it within our policy management framework.
Next, we are going to set up our policy rule using the following code
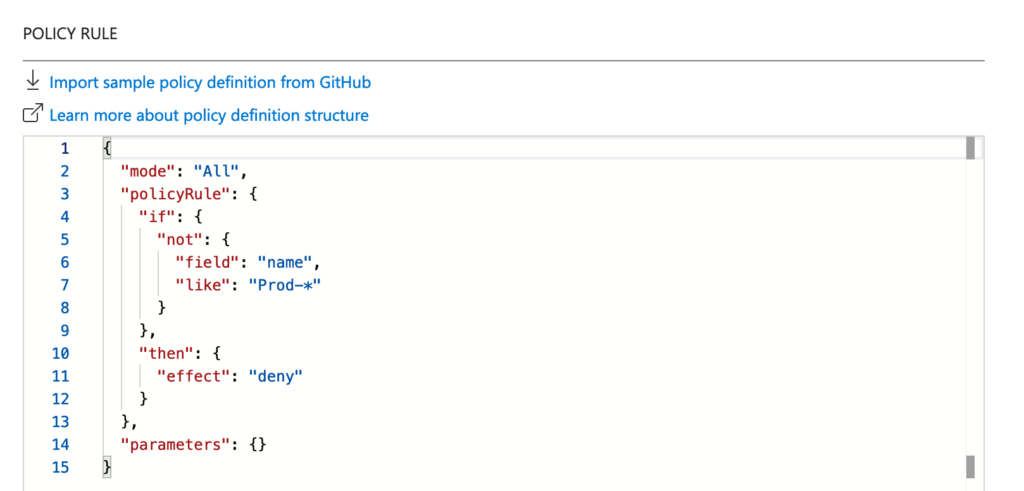
Let’s break this code and understand what it does line by line: so starting with:
- Mode:
"mode": "All": This specifies that the policy applies to all resource types.
- Policy Rule:
- If:
- The
"if"section defines the condition that is being checked. "not": { "field": "name", "like": "Prod-*" }: This condition checks if the resource name does not start with “Prod-“. Thelikeoperator is used with the wildcard character*to match any string that starts with “Prod-“.
- The
- Then:
- The
"then"section defines the action to be taken if the condition is met. "effect": "deny": This effect denies the creation or update of any resource that does not meet the condition specified in the"if"section. In this case, it will deny any resource whose name does not start with “Prod-“.
- The
- If:
- Parameters:
"parameters": {}: This section is empty, indicating that no additional parameters are being used for this policy.
After configuring our policy, we’ll save the settings. Next, we’ll assign the policy to a scope—in my scenario, I’ve assigned it to the resource group ‘rg-azure-policy.’ Additionally, I’ve included a straightforward non-compliance message.
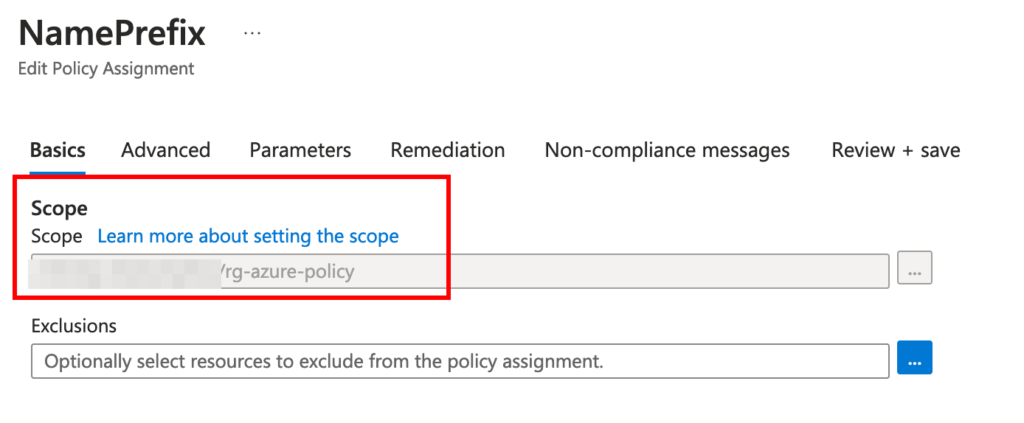
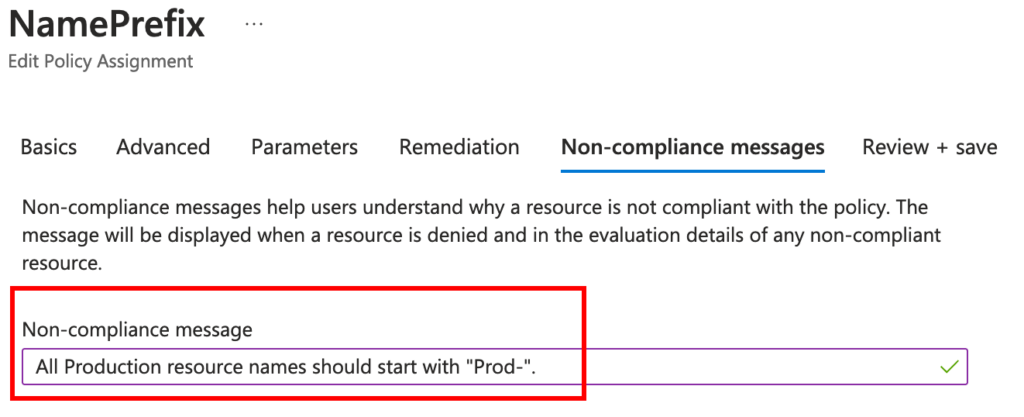
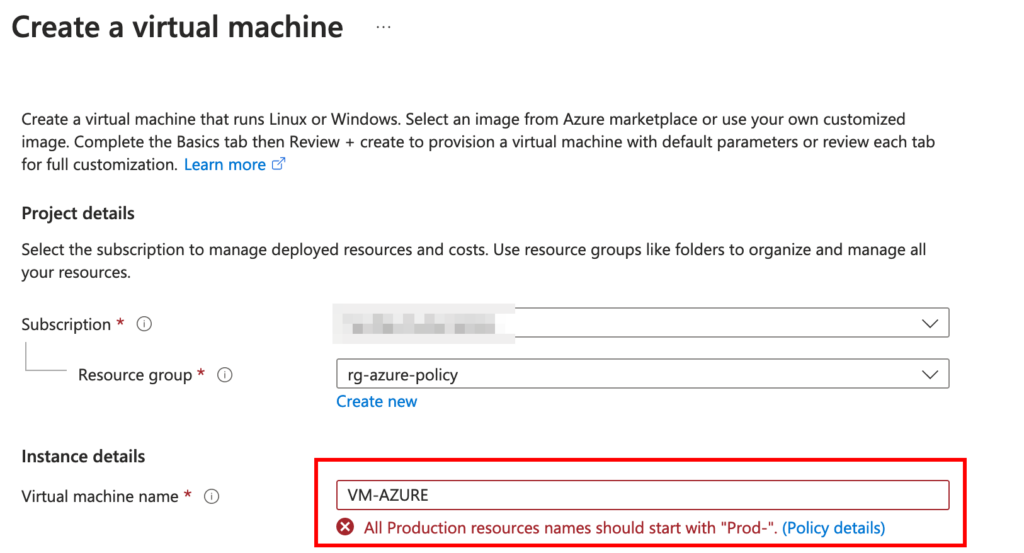
Let’s attempt to create an Azure virtual machine within the ‘rg-azure-policy’ resource group. However, please note that the name must not start with the “Prod-” prefix. If we try to proceed with such a name, we’ll encounter a block due to the policy configuration.
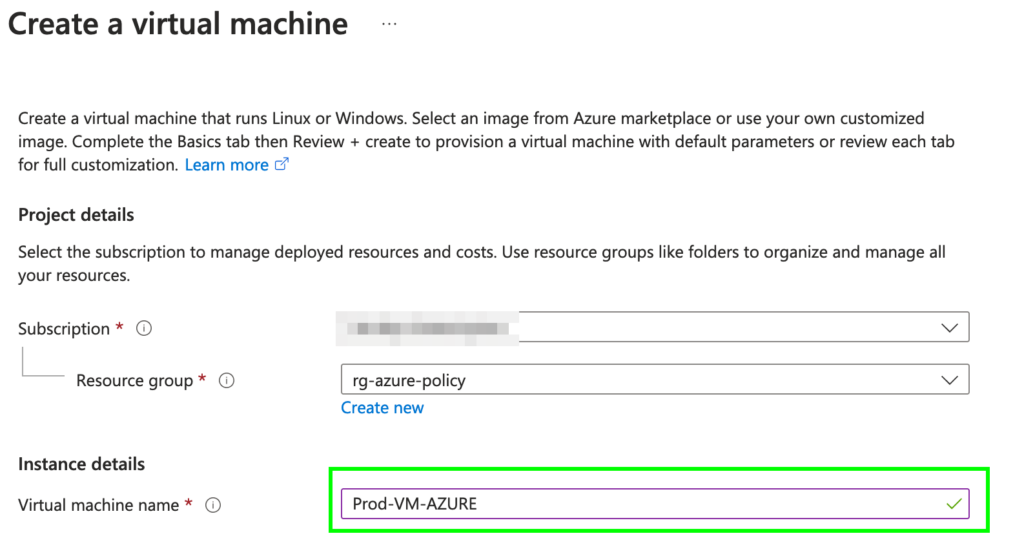
If we use the correct prefix, such as “Prod-“, the creation process will succeed, as demonstrated in the following screenshot.
Conclusion
In this article, we’ve taken a foundational step towards governing your Azure environment by creating a custom policy to enforce consistent naming conventions. This ensures all resources begin with a designated prefix, like “Prod-“, improving organization and simplifying resource management as your cloud infrastructure scales.
But Azure Policies offer far more than just basic naming rules. In the next article, we’ll delve deeper into creating more complex policies that address security best practices, cost optimization, and other critical aspects of Azure governance.

