Introduction
In the realm of licensed software, companies employ various methods to authenticate legitimate users and ensure compliance with licensing agreements. Among these methods, two prominent techniques stand out:
User-Account Licensing: This method entails associating licenses directly with user accounts. Users are required to create accounts through which they obtain licenses, granting them access to the software as needed. This approach offers a degree of flexibility, allowing users to utilize the software across different devices and environments.
MAC Address Licensing: Another prevalent approach involves linking licenses to the MAC addresses of network interface cards. While seemingly straightforward, this method presents significant challenges for IT and system administrators, particularly during hardware upgrades or migrations to cloud environments. In such scenarios, the need to procure new licenses for each device can incur substantial costs. Moreover, the proliferation of licenses across numerous devices within medium to large enterprises exacerbates budgetary constraints.
Consider, for instance, the scenario where a company opts to replace aging hardware or transition its infrastructure to the cloud. The associated expenditure on new licenses for each device can be prohibitive, potentially deterring investment in modernization efforts. Consequently, organizations may prolong the use of outdated equipment, inadvertently exposing themselves to heightened cybersecurity risks.
The ramifications are far-reaching, extending beyond financial considerations to encompass the broader spectrum of security implications. Operating obsolete software versions increases vulnerability to cyber threats, thereby jeopardizing the integrity and confidentiality of corporate data.
MAC address
A MAC address, short for Media Access Control address, is a unique identifier assigned to a network interface controller (NIC) for communications on a network. It is a hardware address embedded into the NIC by the manufacturer and consists of a series of hexadecimal numbers separated by colons or hyphens. MAC addresses are used to uniquely identify devices within a network and facilitate the transmission of data between them. They play a crucial role in network communication and are essential for devices to connect and communicate effectively on local area networks (LANs) and other network environments.
A MAC address typically consists of six groups of two hexadecimal digits (0-9 and A-F), separated by colons or hyphens. Here’s an example of a MAC address in the standard format:
Format: XX:XX:XX:XX:XX:XX or XX-XX-XX-XX-XX-XX
Example: 00:1A:2B:3C:4D:5E
Each pair of hexadecimal digits represents a byte, making up a total of 48 bits. The first three pairs (24 bits) usually indicate the manufacturer of the network interface card (NIC), while the remaining three pairs (24 bits) are typically assigned by the manufacturer and serve as a unique identifier for the specific device.
Note: If the change MAC address on the primary NIC you will lose connectivity that virtual machine.
Change MAC address on Windows VM
Before modifying the MAC address on the Windows VM, it’s essential to create an additional network adapter and associate it with the VM. This ensures that each VM has two network interface cards (NICs) attached: the default NIC for regular connectivity purposes and the second NIC dedicated to MAC address modification.
- Shut down the VM and navigate to Network Settings.
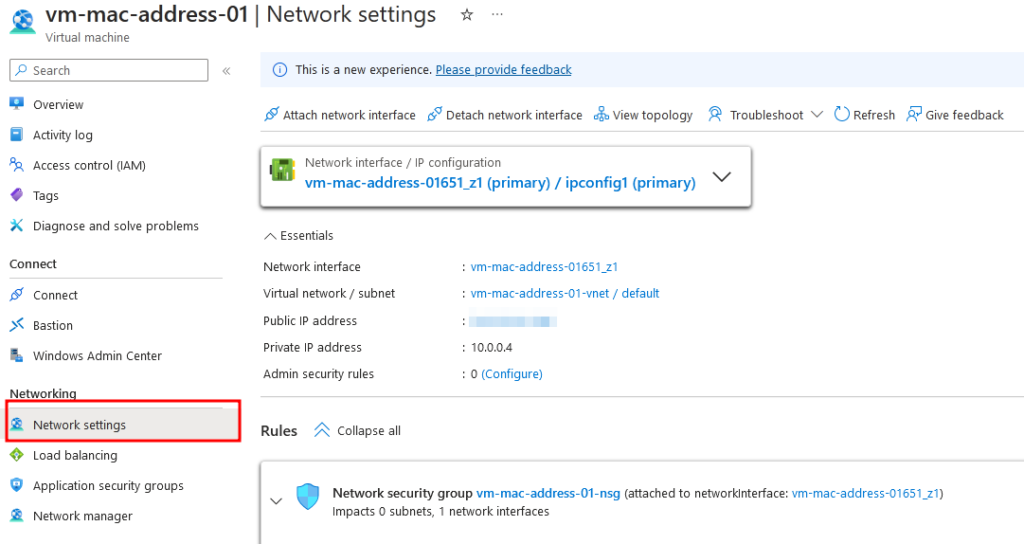
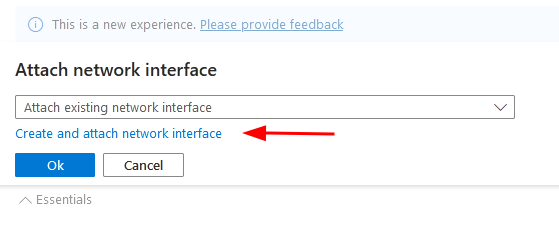
- Click on “Attach Network Adapter” and create and attach the network interface.
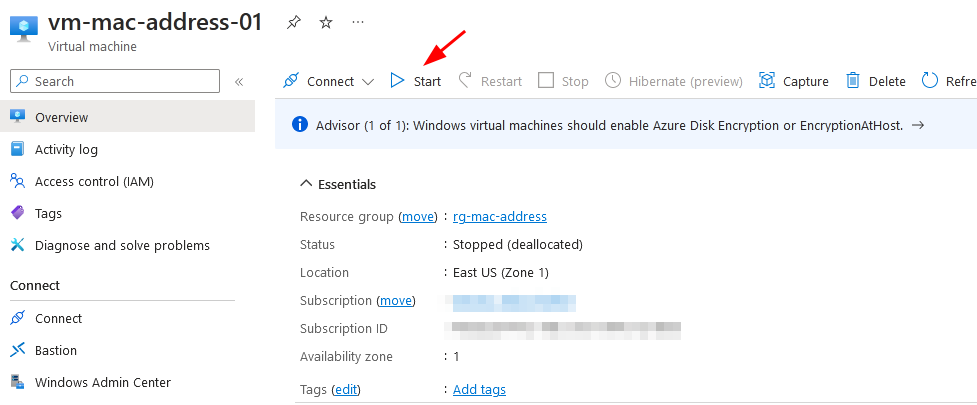
- Start the VM, login, and execute the following PowerShell script. Ensure you select the newly added NIC to change its MAC address. Replace the value of the variable “xxxx” with the MAC address of your choice.
- Before executing the PowerShell script make sure you are targeting the write NIC use the following command to list all the network adapters connected to the Windows VM
Get-NetAdapter
- After checking the right Network adapter we can execute the Powershell script
$Newmacaddress = '00-0D-3B-05-5F-2D'
$Networkadapter = Get-NetAdapter -InterfaceDescription "*#2"
Set-NetAdapter $Networkadapter.Name -MacAddress $Newmacaddress
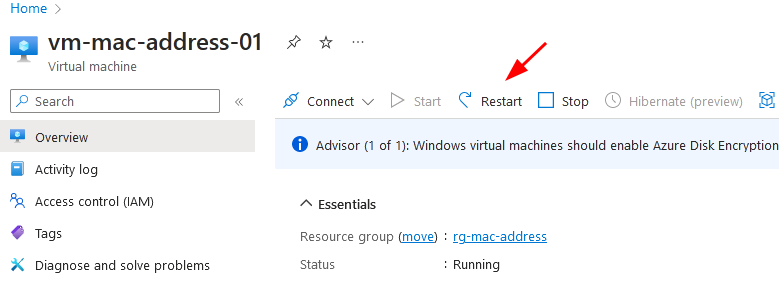
- After executing the script, reboot the VM to verify if the MAC address has been permanently changed.
- Run this command again
Get-NetAdapter
Change MAC address on Linux VM
For Linux VMs, additional steps are required as MAC address changes may not persist by default. In my scenario, I’ve developed a script to address this issue. This script, set to run as a service upon each VM startup, automatically changes the MAC address.
- Shut down the VM and navigate to Network Settings.
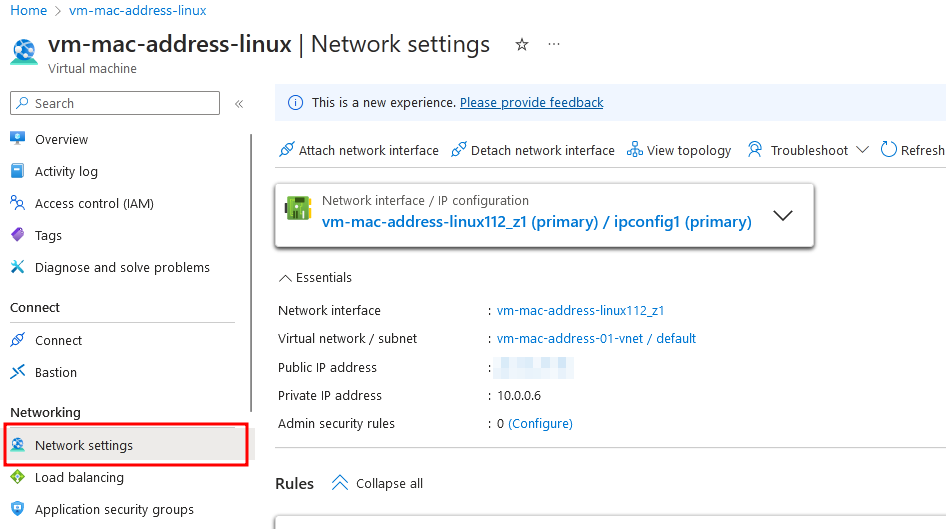
- Click on “Attach Network Adapter” and create a new network adapter.

- Begin by launching the VM, logging in, and then proceed to create a bash script file within a directory of your preference. Ensure to customize the MAC address to your desired value.
#!/bin/bash
# This line will turn down the NIC so it can be configured with the new MAC Address
/sbin/ip link set dev eth1 down
# This line will change the mac address of the secoond NIC which is name is eth1 with the NEW Mac address
/sbin/ip link set dev eth1 address 00-0D-3B-05-5F-2D
# This line will turn up the NIC after changing the MAC Address
/sbin/ip link set dev eth1 up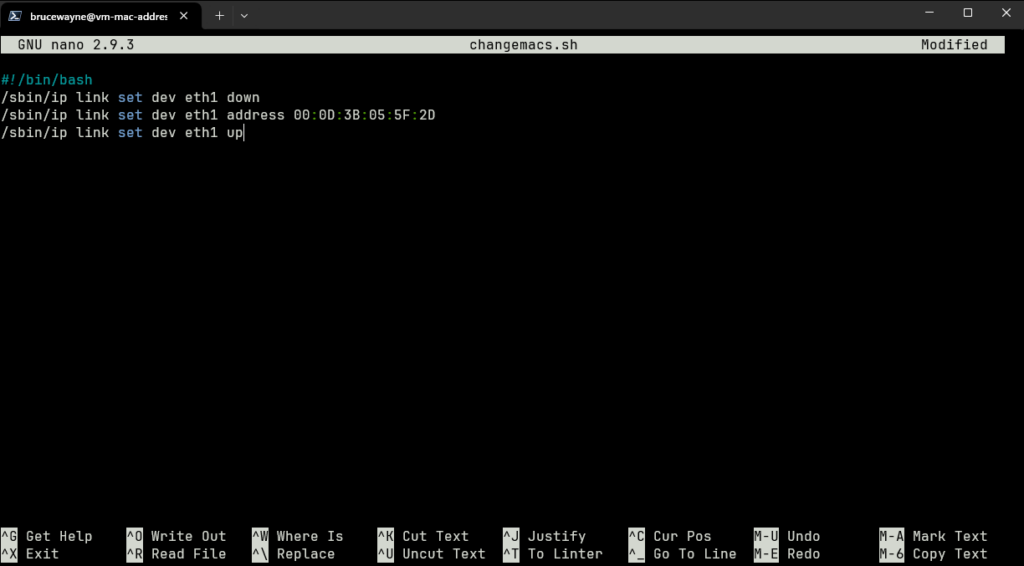
- Now, transitioning to the automation phase, we’ll establish a service that initiates upon VM boot, ensuring the permanent alteration of the MAC address.
#Autmation

#Create a service unit file for your script. For example, create a file called myscript.service in the /etc/systemd/system/ directory:
sudo nano /etc/systemd/system/changemacaddress.service
#2. Add the following content to the file:
[Unit]
Description=My Script
After=network.target

[Service]
ExecStart=/path/to/your/script.sh

[Install]
WantedBy=default.target
#Replace /path/to/your/script.sh with the actual path to your Bash script.
#3. Save the file and exit the text editor.
#4. Reload the systemd daemon to load the new service unit file:
sudo systemctl daemon-reload
#5. Enable the service to start at boot:
sudo systemctl enable myscript.service
#6. Start the service:
sudo systemctl start myscript.service
#Now, your Bash script will be executed at startup.
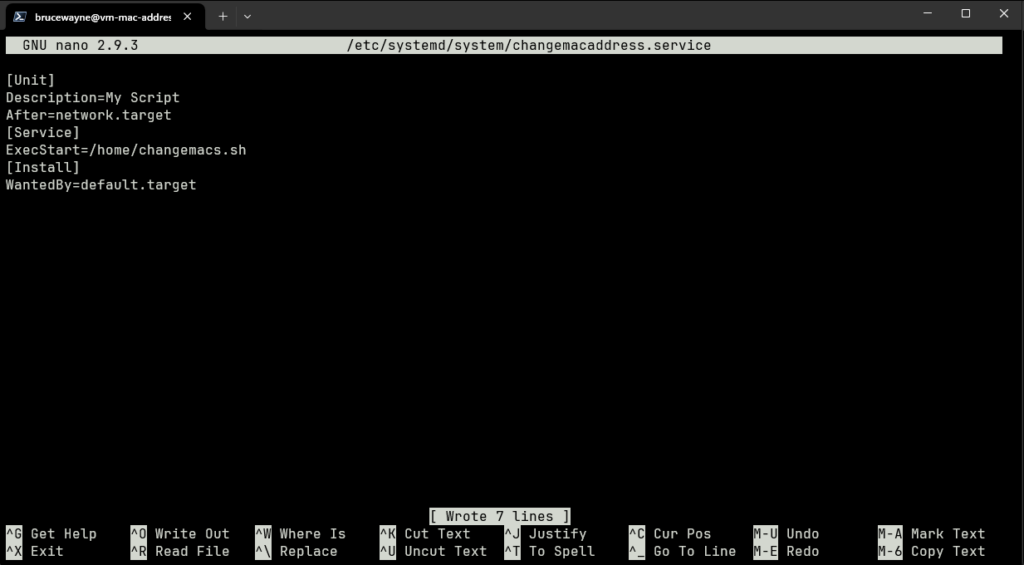

- After creating the shell script to change the MAC address and creating a service that will run the script each time the VM is booted, reboot the VM to verify if the MAC address has been permanently changed.

Conclusion
In this article, we’ve addressed the challenges of software licensing in Azure VMs by exploring the necessity and process of permanently modifying MAC addresses. By providing clear instructions for both Windows and Linux VMs, we’ve empowered users to streamline licensing management and enhance security. With these insights, Azure users can optimize their infrastructure, reduce costs, and mitigate cybersecurity risks, unlocking new efficiencies in VM deployments.

